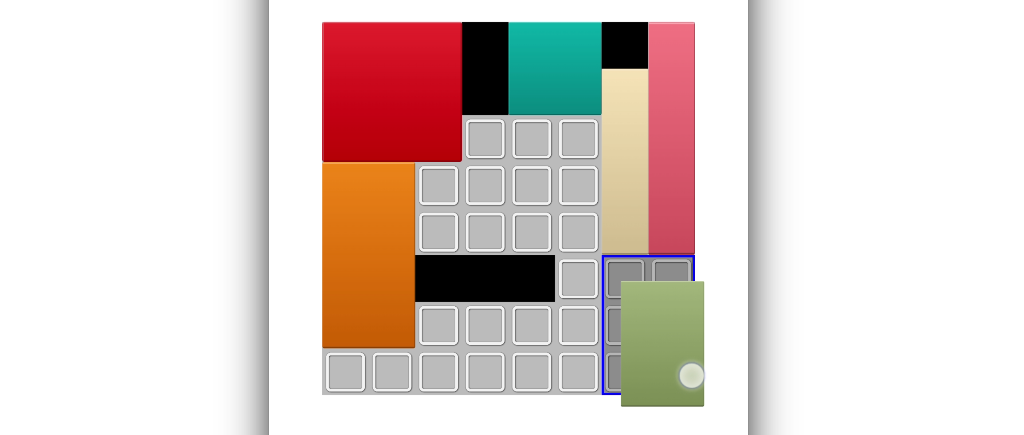
This multipart series will teach you how to create a simple puzzle game for Android and iOS using Titanium SDK. In the game you will have to place all game-blocks in an area. The game-blocks have different sizes and there a blocker fields inside the game area.
You can download the full game in the play/app store:


In the first part we will setup the project and start with the basic block movement.
Setting up the project
If you are completely new to Titanium SDK you should start with the “installation tutorial” and then the “create your first mobile app” tutorial.
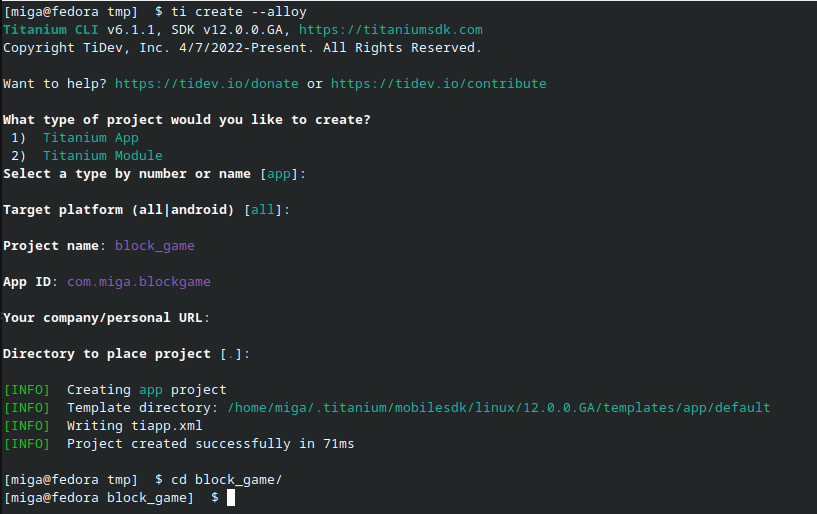
Once you have the basic toolchain up and running you can create a new project:
ti create --alloy (shortcut to create an Alloy project in Ti 12.0.0+)
Fill out the questions and open the new project folder in your editor.
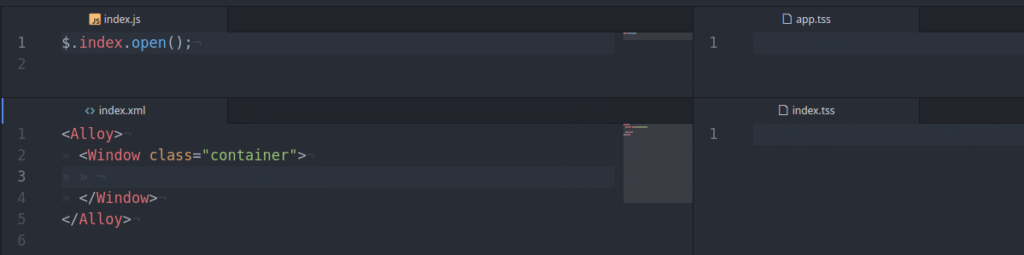
Cleaning the project
The first thing we do is to remove all the template code and make the index.js, index.xml, app.tss and index.tss empty and keeping just the <Window> and the $.index.open() method.
After that we spin up the emulator/device and run the app using Liveview to update the app when we save it:
ti build -p android --liveview (running a build on Android)
You should see an empty/blank app on your phone now.
Show and move a block
Inside the game we should be able to touch and move blocks. So at first we will start with the basic movement and a single view.
In your index.xml add a simple View block and add some TSS to show it into index.tss:
					<alloy>
	<window>
		<view id="view"/>
	</window>
</alloy>
					"#view" : {
  width: 40,
  height: 40,
  backgroundColor: 'red'
}
A red block should appear on your device! It’s time to move it around.
The logic is that we will have an “activeItem” where we store the block that the user touched and will be moved. Once we release the touch it will stop to move that block.
Titanium SDK has touchstart, touchmove and touchend events to deal with touching and moving. The coordinates are in local space, so if we start the touch on our view it will give you the x and y coordinates of your finger inside that view:

We store those values in variables and then disable the touch on the view and use the touchmove event of the window to move the view around.
Setup the events and the event methods:
					<alloy>
	<window onTouchmove="onTouchmove" onTouchend="onTouchend">
		<view id="view" onTouchstart="onTouchstart"/>
	</window>
</alloy>
					function onTouchstart(e){}
function onTouchmove(e){}
function onTouchend(e){}
$.index.open();
Like mentioned above we want to store the active item, start values and if we are moving or not, so we’ll add some variables first:
					var startX = 0;       // local coordinate on the view
var startY = 0;	      // local coordinate on the view
var isMoving = false; // should we move the block?
var activeItem = $.view;  // for now it is our red view
First our onTouchstart: get the coordinates on the view, store them and enable moving on the view so we catch the window coordinates below our finger:
					function onTouchstart(e) {
	startX = e.x;  // store local x
	startY = e.y;  // store local y
	isMoving = true;  // now we can move the view
}
Now we can move the block in our Window onTouchmove event:
					function onTouchmove(e) {
	if (isMoving) {
	    // only move if isMoving is active
	    let convertedPoint = activeItem.convertPointToView({
	       x: e.x,
	       y: e.y
	    }, activeItem.parent); // convert local coordinate to parent space
		activeItem.left = convertedPoint.x - startX; // move the view to the current coordinate - startX
		activeItem.top = convertedPoint.y - startY;  // move the view to the current coordinate - startY
	}
}
The last step is to stop moving once we lift up the finger. With the help of our isMoving variable it won’t just move the view while we click on the white area. It will just move the view when we start inside our red view.
					function onTouchend(e) {
	isMoving = false; // disable moving
}
You should be able to move the red view now when you touch and move it:
https://www.fromzerotoapp.com/wp-content/uploads/2023/01/game_moving_item.mp4
That’s it for this tutorial
This was the last step in the first tutorial. You have a basic setup now where you are able to move an item.
In the next tutorial we will start to move the item in a grid and add some blocks that will prevent our game object from being dragged onto.
Next part
Check part 2 for grid movement.