Sometimes you have to create an UI element that you should be able to swipe from left to right as often as the user wants to. The build-in ScrollableView is a nice component to get the swipe and stop motion out of the box. You just have to find a way to add your views into it. In this short tutorial we will use just 3 views and cycle through them to fake endless scrolling.
Base setup
At first we create a simple window with a ScrollableView, three slides and a label on each of the pages:
<Alloy>
    <Window>
        <ScrollableView id="scroll">
            <View id="v1">
                <Label id="l1" text="1"/>
            </View>
            <View id="v2">
                <Label id="l2" text="2"/>
            </View>
            <View id="v3">
                <Label id="l3" text="3"/>
            </View>
        </ScrollableView>
    </Window>
</Alloy>
and this is our index.js file:
$.index.open();When we start the app it will look like this:
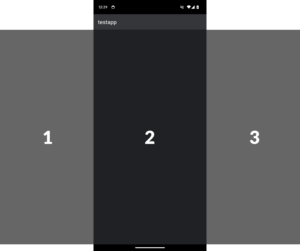
Three pages with three labels – all we need. The idea is now to start in the middle and then depending on the scroll direction we put different content into each of the views while jumping back to the center slide.
Add events
The first code we add is a scrollEnd event. Put onScrollend="onScollend" on your <ScrollableView> and function onScollend(e) {} into index.js. That way we’ll get notified when the user stopped scrolling and we can check the page.
<Alloy>
    <Window>
        <ScrollableView id="scroll" onScrollend="onScrollend">
            <View id="v1">
                <Label id="l1" text="1"/>
            </View>
            <View id="v2">
                <Label id="l2" text="2"/>
            </View>
            <View id="v3">
                <Label id="l3" text="3"/>
            </View>
        </ScrollableView>
    </Window>
</Alloy>
$.index.open();
function onScollend(e) {
console.log(e.currentPage);
}Swap content code
Now it is time to make it swap content. In our example we just want to increase/decrease the value of the label.
As mentioned before: we want to start with the center slide so we can swipe left or right. Since that label is showing 2 we have to keep track of that the following way:
let centerValue = 2;            // label text in the center
$.scroll.currentPage = 1;  // show center slide at start-up
The last step is to check if the user swiped left (so currentPage is 0) or right (currentPage is 1) and move the user back to the center slide. While doing that we change the labels on all three slides so it looks like the user is on a different slide:
function onScollend(e) {
	if (e.currentPage == 0) {
		// left swipe - decrease centerValue
		centerValue -= 1;
	} else if (e.currentPage == 2) {
		// right swipe - increade centerValue
		centerValue += 1;
	}

	// set the value of each label
	$.l1.text = centerValue - 1;    // label in the prev. view
	$.l2.text = centerValue;         // label in the center view
	$.l3.text = centerValue + 1;  // label in the next view

	// move to the center slide again
	$.scroll.currentPage = 1;
}
For the user it looks like an endless slider now

Instead of a simple label you can swap the whole content of the views with the previous/next calender view of course. Just keep in mind: if it takes a bit to create the content you should disable swiping until your content is ready.